{var%20f='http://v.t.sina.com.cn/share/share.php?appkey=1515056452',u=z||d.location,p=['&url=',e(u),'&title=',e(t||d.title),'&source=',e(r),'&sourceUrl=',e(l),'&content=',c||'gb2312','&pic=',e(p||'')].join('');function%20a(){if(!window.open([f,p].join(''),'mb',['toolbar=0,status=0,resizable=1,width=440,height=430,left=',(s.width-440)/2,',top=',(s.height-430)/2].join('')))u.href=[f,p].join('');};if(/Firefox/.test(navigator.userAgent))setTimeout(a,0);else%20a();})(screen,document,encodeURIComponent,'','','https://www.xiaopingtou.cn//data/attach/topic/topicKPo7gB.jpg', '推荐 hong19860320 的文章《Android源码基础解析之电源开关机按键事件流程》','https://www.xiaopingtou.cn/article-89997.html','页面编码gb2312|utf-8默认gb2312'));)
转载自:http://blog.csdn.net/qq_23547831/article/details/51487978
前面我们讲解了系统截屏按键处理流程,HOME按键处理流程,今天再来讲解一下电源开关机按键事件流程,当然这也是系统按键处理流程方面的最后一篇博客了。
和截屏按键、HOME按键的处理流程类似,电源按键由于也是系统级别的按键,所以对其的事件处理逻辑是和截屏按键、HOME按键类似,不在某一个App中,而是在PhoneWindowManager的dispatchUnhandledKey方法中。所以和前面两篇类似,这里我们也是从PhoneWindowManager的dispatchUnhandledKey方法开始我们今天电源开关机按键的事件流程分析。
下面首先看一下dispatchUnhandledKey方法的实现逻辑:
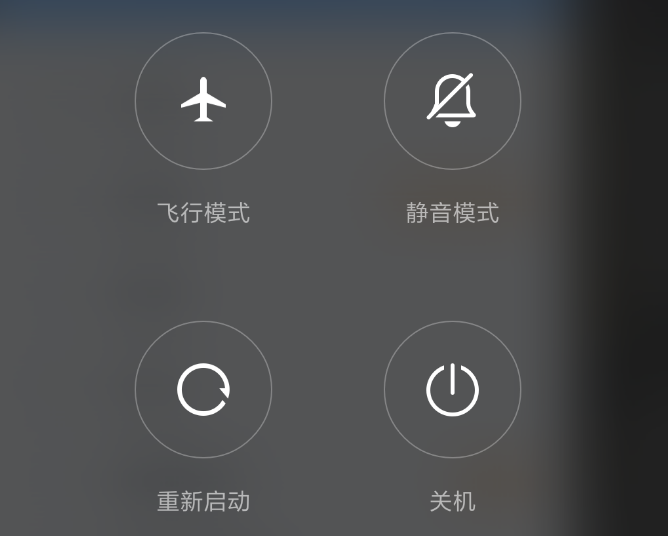 然后第三第四个case分之则是直接调用关机方法,这里我们先看第二个case,看看系统是如何显示出关机操作界面的。那我们看一下showGlobalActionsInternal方法的实现逻辑。
public KeyEvent dispatchUnhandledKey(WindowState win, KeyEvent event, int policyFlags) {
        ...
        KeyEvent fallbackEvent = null;
        if ((event.getFlags() & KeyEvent.FLAG_FALLBACK) == 0) {
            final KeyCharacterMap kcm = event.getKeyCharacterMap();
            final int keyCode = event.getKeyCode();
            final int metaState = event.getMetaState();
            final boolean initialDown = event.getAction() == KeyEvent.ACTION_DOWN
                    && event.getRepeatCount() == 0;

            // Check for fallback actions specified by the key character map.
            final FallbackAction fallbackAction;
            if (initialDown) {
                fallbackAction = kcm.getFallbackAction(keyCode, metaState);
            } else {
                fallbackAction = mFallbackActions.get(keyCode);
            }

            if (fallbackAction != null) {
                if (DEBUG_INPUT) {
                    Slog.d(TAG, "Fallback: keyCode=" + fallbackAction.keyCode
                            + " metaState=" + Integer.toHexString(fallbackAction.metaState));
                }

                final int flags = event.getFlags() | KeyEvent.FLAG_FALLBACK;
                fallbackEvent = KeyEvent.obtain(
                        event.getDownTime(), event.getEventTime(),
                        event.getAction(), fallbackAction.keyCode,
                        event.getRepeatCount(), fallbackAction.metaState,
                        event.getDeviceId(), event.getScanCode(),
                        flags, event.getSource(), null);

                if (!interceptFallback(win, fallbackEvent, policyFlags)) {
                    fallbackEvent.recycle();
                    fallbackEvent = null;
                }

                if (initialDown) {
                    mFallbackActions.put(keyCode, fallbackAction);
                } else if (event.getAction() == KeyEvent.ACTION_UP) {
                    mFallbackActions.remove(keyCode);
                    fallbackAction.recycle();
                }
            }
        }
        ...
        return fallbackEvent;
}- 1
- 2
- 3
- 4
- 5
- 6
- 7
- 8
- 9
- 10
- 11
- 12
- 13
- 14
- 15
- 16
- 17
- 18
- 19
- 20
- 21
- 22
- 23
- 24
- 25
- 26
- 27
- 28
- 29
- 30
- 31
- 32
- 33
- 34
- 35
- 36
- 37
- 38
- 39
- 40
- 41
- 42
- 43
- 44
- 45
- 46
- 47
- 48
private boolean interceptFallback(WindowState win, KeyEvent fallbackEvent, int policyFlags) {
        int actions = interceptKeyBeforeQueueing(fallbackEvent, policyFlags);
        if ((actions & ACTION_PASS_TO_USER) != 0) {
            long delayMillis = interceptKeyBeforeDispatching(
                    win, fallbackEvent, policyFlags);
            if (delayMillis == 0) {
                return true;
            }
        }
        return false;
}- 1
- 2
- 3
- 4
- 5
- 6
- 7
- 8
- 9
- 10
- 11
public int interceptKeyBeforeQueueing(KeyEvent event, int policyFlags) {
        ...
            case KeyEvent.KEYCODE_POWER: {
                result &= ~ACTION_PASS_TO_USER;
                isWakeKey = false; // wake-up will be handled separately
                if (down) {
                    interceptPowerKeyDown(event, interactive);
                } else {
                    interceptPowerKeyUp(event, interactive, canceled);
                }
                break;
            }
            ...

        return result;
}- 1
- 2
- 3
- 4
- 5
- 6
- 7
- 8
- 9
- 10
- 11
- 12
- 13
- 14
- 15
- 16
private void interceptPowerKeyDown(KeyEvent event, boolean interactive) {
        ...
        // Latch power key state to detect screenshot chord.
        if (interactive && !mScreenshotChordPowerKeyTriggered
                && (event.getFlags() & KeyEvent.FLAG_FALLBACK) == 0) {
            mScreenshotChordPowerKeyTriggered = true;
            mScreenshotChordPowerKeyTime = event.getDownTime();
            interceptScreenshotChord();
        }

        // Stop ringing or end call if configured to do so when power is pressed.
        TelecomManager telecomManager = getTelecommService();
        boolean hungUp = false;
        if (telecomManager != null) {
            if (telecomManager.isRinging()) {
                // Pressing Power while there's a ringing incoming
                // call should silence the ringer.
                telecomManager.silenceRinger();
            } else if ((mIncallPowerBehavior
                    & Settings.Secure.INCALL_POWER_BUTTON_BEHAVIOR_HANGUP) != 0
                    && telecomManager.isInCall() && interactive) {
                // Otherwise, if "Power button ends call" is enabled,
                // the Power button will hang up any current active call.
                hungUp = telecomManager.endCall();
            }
        }

        // If the power key has still not yet been handled, then detect short
        // press, long press, or multi press and decide what to do.
        mPowerKeyHandled = hungUp || mScreenshotChordVolumeDownKeyTriggered
                || mScreenshotChordVolumeUpKeyTriggered;
        if (!mPowerKeyHandled) {
            if (interactive) {
                // When interactive, we're already awake.
                // Wait for a long press or for the button to be released to decide what to do.
                if (hasLongPressOnPowerBehavior()) {
                    Message msg = mHandler.obtainMessage(MSG_POWER_LONG_PRESS);
                    msg.setAsynchronous(true);
                    mHandler.sendMessageDelayed(msg,
                            ViewConfiguration.get(mContext).getDeviceGlobalActionKeyTimeout());
                }
            } else {
                wakeUpFromPowerKey(event.getDownTime());

                if (mSupportLongPressPowerWhenNonInteractive && hasLongPressOnPowerBehavior()) {
                    Message msg = mHandler.obtainMessage(MSG_POWER_LONG_PRESS);
                    msg.setAsynchronous(true);
                    mHandler.sendMessageDelayed(msg,
                            ViewConfiguration.get(mContext).getDeviceGlobalActionKeyTimeout());
                    mBeganFromNonInteractive = true;
                } else {
                    final int maxCount = getMaxMultiPressPowerCount();

                    if (maxCount <= 1) {
                        mPowerKeyHandled = true;
                    } else {
                        mBeganFromNonInteractive = true;
                    }
                }
            }
        }
}- 1
- 2
- 3
- 4
- 5
- 6
- 7
- 8
- 9
- 10
- 11
- 12
- 13
- 14
- 15
- 16
- 17
- 18
- 19
- 20
- 21
- 22
- 23
- 24
- 25
- 26
- 27
- 28
- 29
- 30
- 31
- 32
- 33
- 34
- 35
- 36
- 37
- 38
- 39
- 40
- 41
- 42
- 43
- 44
- 45
- 46
- 47
- 48
- 49
- 50
- 51
- 52
- 53
- 54
- 55
- 56
- 57
- 58
- 59
- 60
- 61
- 62
case MSG_POWER_LONG_PRESS:
                    powerLongPress();
break;- 1
- 2
- 3
private void powerLongPress() {
        final int behavior = getResolvedLongPressOnPowerBehavior();
        switch (behavior) {
        case LONG_PRESS_POWER_NOTHING:
            break;
        case LONG_PRESS_POWER_GLOBAL_ACTIONS:
            mPowerKeyHandled = true;
            if (!performHapticFeedbackLw(null, HapticFeedbackConstants.LONG_PRESS, false)) {
                performAuditoryFeedbackForAccessibilityIfNeed();
            }
            showGlobalActionsInternal();
            break;
        case LONG_PRESS_POWER_SHUT_OFF:
        case LONG_PRESS_POWER_SHUT_OFF_NO_CONFIRM:
            mPowerKeyHandled = true;
            performHapticFeedbackLw(null, HapticFeedbackConstants.LONG_PRESS, false);
            sendCloseSystemWindows(SYSTEM_DIALOG_REASON_GLOBAL_ACTIONS);
            mWindowManagerFuncs.shutdown(behavior == LONG_PRESS_POWER_SHUT_OFF);
            break;
        }
}- 1
- 2
- 3
- 4
- 5
- 6
- 7
- 8
- 9
- 10
- 11
- 12
- 13
- 14
- 15
- 16
- 17
- 18
- 19
- 20
- 21
然后第三第四个case分之则是直接调用关机方法,这里我们先看第二个case,看看系统是如何显示出关机操作界面的。那我们看一下showGlobalActionsInternal方法的实现逻辑。
void showGlobalActionsInternal() {
        sendCloseSystemWindows(SYSTEM_DIALOG_REASON_GLOBAL_ACTIONS);
        if (mGlobalActions == null) {
            mGlobalActions = new GlobalActions(mContext, mWindowManagerFuncs);
        }
        final boolean keyguardShowing = isKeyguardShowingAndNotOccluded();
        mGlobalActions.showDialog(keyguardShowing, isDeviceProvisioned());
        if (keyguardShowing) {
            // since it took two seconds of long press to bring this up,
            // poke the wake lock so they have some time to see the dialog.
            mPowerManager.userActivity(SystemClock.uptimeMillis(), false);
        }
}- 1
- 2
- 3
- 4
- 5
- 6
- 7
- 8
- 9
- 10
- 11
- 12
- 13
public GlobalActions(Context context, WindowManagerFuncs windowManagerFuncs) {
        mContext = context;
        mWindowManagerFuncs = windowManagerFuncs;
        mAudioManager = (AudioManager) mContext.getSystemService(Context.AUDIO_SERVICE);
        mDreamManager = IDreamManager.Stub.asInterface(
                ServiceManager.getService(DreamService.DREAM_SERVICE));

        // receive broadcasts
        IntentFilter filter = new IntentFilter();
        filter.addAction(Intent.ACTION_CLOSE_SYSTEM_DIALOGS);
        filter.addAction(Intent.ACTION_SCREEN_OFF);
        filter.addAction(TelephonyIntents.ACTION_EMERGENCY_CALLBACK_MODE_CHANGED);
        context.registerReceiver(mBroadcastReceiver, filter);

        ConnectivityManager cm = (ConnectivityManager)
                context.getSystemService(Context.CONNECTIVITY_SERVICE);
        mHasTelephony = cm.isNetworkSupported(ConnectivityManager.TYPE_MOBILE);

        // get notified of phone state changes
        TelephonyManager telephonyManager =
                (TelephonyManager) context.getSystemService(Context.TELEPHONY_SERVICE);
        telephonyManager.listen(mPhoneStateListener, PhoneStateListener.LISTEN_SERVICE_STATE);
        mContext.getContentResolver().registerContentObserver(
                Settings.Global.getUriFor(Settings.Global.AIRPLANE_MODE_ON), true,
                mAirplaneModeObserver);
        Vibrator vibrator = (Vibrator) mContext.getSystemService(Context.VIBRATOR_SERVICE);
        mHasVibrator = vibrator != null && vibrator.hasVibrator();

        mShowSilentToggle = SHOW_SILENT_TOGGLE && !mContext.getResources().getBoolean(
                com.android.internal.R.bool.config_useFixedVolume);
}- 1
- 2
- 3
- 4
- 5
- 6
- 7
- 8
- 9
- 10
- 11
- 12
- 13
- 14
- 15
- 16
- 17
- 18
- 19
- 20
- 21
- 22
- 23
- 24
- 25
- 26
- 27
- 28
- 29
- 30
- 31
public void showDialog(boolean keyguardShowing, boolean isDeviceProvisioned) {
        mKeyguardShowing = keyguardShowing;
        mDeviceProvisioned = isDeviceProvisioned;
        if (mDialog != null) {
            mDialog.dismiss();
            mDialog = null;
            // Show delayed, so that the dismiss of the previous dialog completes
            mHandler.sendEmptyMessage(MESSAGE_SHOW);
        } else {
            handleShow();
        }
}- 1
- 2
- 3
- 4
- 5
- 6
- 7
- 8
- 9
- 10
- 11
- 12
private void handleShow() {
        awakenIfNecessary();
        mDialog = createDialog();
        prepareDialog();

        // If we only have 1 item and it's a simple press action, just do this action.
        if (mAdapter.getCount() == 1
                && mAdapter.getItem(0) instanceof SinglePressAction
                && !(mAdapter.getItem(0) instanceof LongPressAction)) {
            ((SinglePressAction) mAdapter.getItem(0)).onPress();
        } else {
            WindowManager.LayoutParams attrs = mDialog.getWindow().getAttributes();
            attrs.setTitle("GlobalActions");
            mDialog.getWindow().setAttributes(attrs);
            mDialog.show();
            mDialog.getWindow().getDecorView().setSystemUiVisibility(View.STATUS_BAR_DISABLE_EXPAND);
}- 1
- 2
- 3
- 4
- 5
- 6
- 7
- 8
- 9
- 10
- 11
- 12
- 13
- 14
- 15
- 16
- 17
private GlobalActionsDialog createDialog() {
        ...
        mAirplaneModeOn = new ToggleAction(
                R.drawable.ic_lock_airplane_mode,
                R.drawable.ic_lock_airplane_mode_off,
                R.string.global_actions_toggle_airplane_mode,
                R.string.global_actions_airplane_mode_on_status,
                R.string.global_actions_airplane_mode_off_status) {

            void onToggle(boolean on) {
                if (mHasTelephony && Boolean.parseBoolean(
                        SystemProperties.get(TelephonyProperties.PROPERTY_INECM_MODE))) {
                    mIsWaitingForEcmExit = true;
                    // Launch ECM exit dialog
                    Intent ecmDialogIntent =
                            new Intent(TelephonyIntents.ACTION_SHOW_NOTICE_ECM_BLOCK_OTHERS, null);
                    ecmDialogIntent.addFlags(Intent.FLAG_ACTIVITY_NEW_TASK);
                    mContext.startActivity(ecmDialogIntent);
                } else {
                    changeAirplaneModeSystemSetting(on);
                }
            }

            @Override
            protected void changeStateFromPress(boolean buttonOn) {
                if (!mHasTelephony) return;

                // In ECM mode airplane state cannot be changed
                if (!(Boolean.parseBoolean(
                        SystemProperties.get(TelephonyProperties.PROPERTY_INECM_MODE)))) {
                    mState = buttonOn ? State.TurningOn : State.TurningOff;
                    mAirplaneState = mState;
                }
            }

            public boolean showDuringKeyguard() {
                return true;
            }

            public boolean showBeforeProvisioning() {
                return false;
            }
        };
        onAirplaneModeChanged();

        mItems = new ArrayList();
        String[] defaultActions = mContext.getResources().getStringArray(
                com.android.internal.R.array.config_globalActionsList);

        ArraySet addedKeys = new ArraySet();
        for (int i = 0; i < defaultActions.length; i++) {
            String actionKey = defaultActions[i];
            if (addedKeys.contains(actionKey)) {
                // If we already have added this, don't add it again.
                continue;
            }
            if (GLOBAL_ACTION_KEY_POWER.equals(actionKey)) {
                mItems.add(new PowerAction());
            } else if (GLOBAL_ACTION_KEY_AIRPLANE.equals(actionKey)) {